It may seem that a joystick, with its molded plastic parts, would be impossible to make at home. Open a Commodore or Atari joystick, though, and you'll see that it's not that complex. In fact, it only contains five switches.
Four of the joystick's switches are used to detect the direction the control stick is pushed. The fifth acts as a fire button. A switch is pressed if the joystick is moved up, down, left, or right. If the stick is moved diagonally, two switches are pressed. Moving the stick diagonally up and to the right, for example, presses both the "up" and "right" switches.
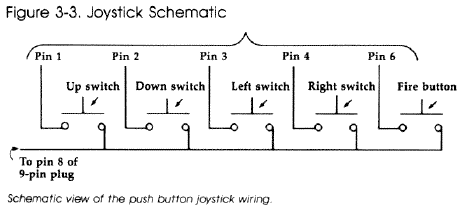
These switches are used to make the connection between one of the five input lines (pins 1, 2, 3, 4, and 6) of the control port and the ground (pin 8). Instead of your touching wires together, as you did while experimenting with the control port, switches are closed to make the connections.
Since a joystick is basically a set of switches, you can make your own version of this device. In your first joystick, four push button switches are substituted for the control stick. The four buttons correspond to the directions a joystick can indicate-up, down, left, and right. To get diagonal directions, you'll press two buttons, the top and right buttons to indicate a move upward and toward the right, for instance. The fire button is a fifth push button switch and functions just as does its counterpart on a commerical joystick.
As you can imagine, the push button joystick works better with some programs than with others. The push button joystick lets you move with greater control in games and in applications where movement in the four main directions is required. Applications or games requiring diagonal moves, however, are trickier than with a standard joystick.
To make a push button joystick for your Commodore or Atari computer, you'll need the following parts:
| Quantity |
Part |
Part Number |
| 5 |
Momentary contact normally open switches |
275-1547 |
| 1 |
Plastic case |
270-231 |
| 1 |
9-pin D-subminiature female |
276-1538 |
| You'll also need some stranded
copper wire or ribbon cable. |
||
1. Cut six pieces of wire about 24 inches long. Remove about 1/4 inch of insulation from each end. Solder wires to pins 1, 2, 3, 4, 6, and 8 of the 9-pin plug.
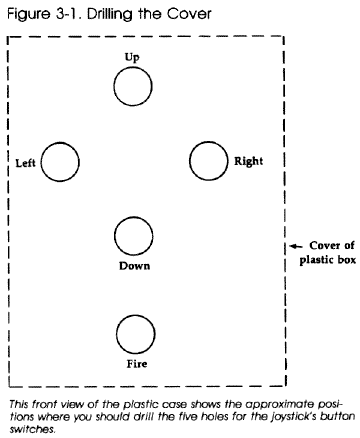
2. Remove the cover from the plastic case and drill five holes for the switches (Figure 3-1).
3. Mount a switch in each of these holes.
4. Drill a hole in the top end (the end closest to the up switch) of the plastic case for the wires from the connector.
5. Pull the six wires from the 9-pin plug through the hole you just drilled, and about 10 centimeters from their ends, tie them in a knot so that they can't be pulled back through the hole.
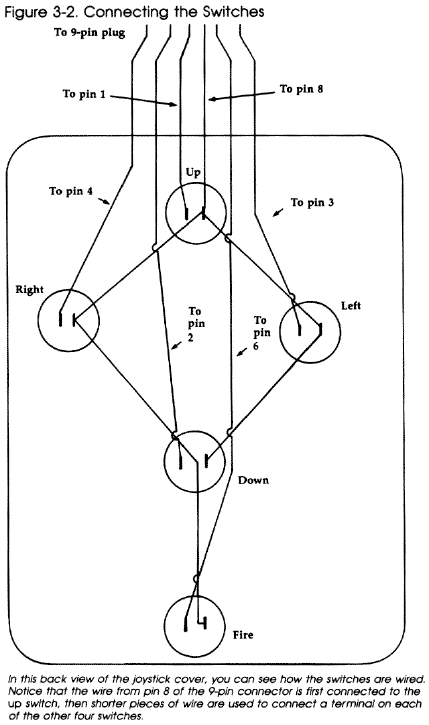
6. Solder the wire from pin 8 to one of the terminals of a switch (probably the up switch, since it's closest to the hole you drilled in the top side of the cover). Using several small lengths of wire, connect this terminal to a terminal of each of the other four switches in a jumper fashion (Figure 3-2).
7. Take the wire from pin 1 of the plug and solder it to the free terminal of the up switch (see Figure 3-2 for a layout view, or Figure 3-3 for a schematic view).
8. Solder the wire from pin 2 to the free terminal of the down switch.
9. Solder the wire from pins 3, 4, and 6 to the free terminals of the left, right, and fire switches respectively.
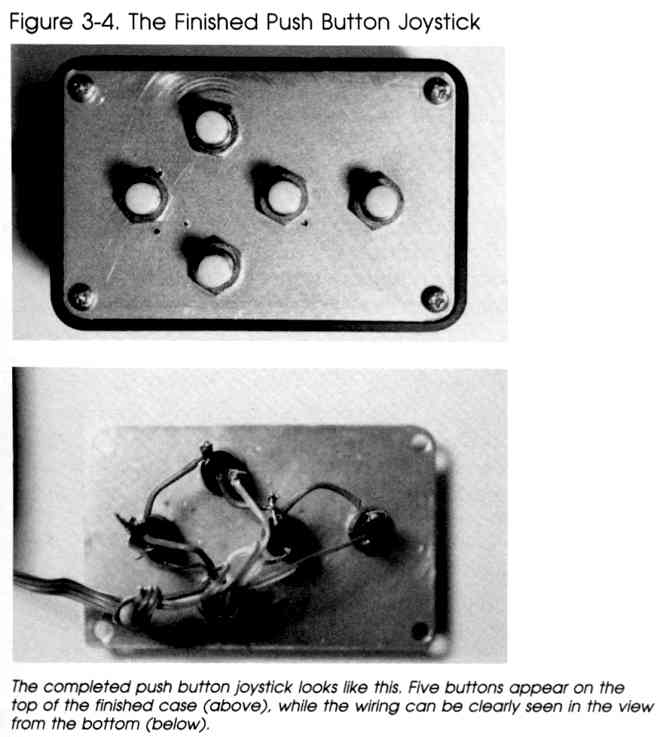
10. Replace the cover of the plastic case. Your joystick is complete.
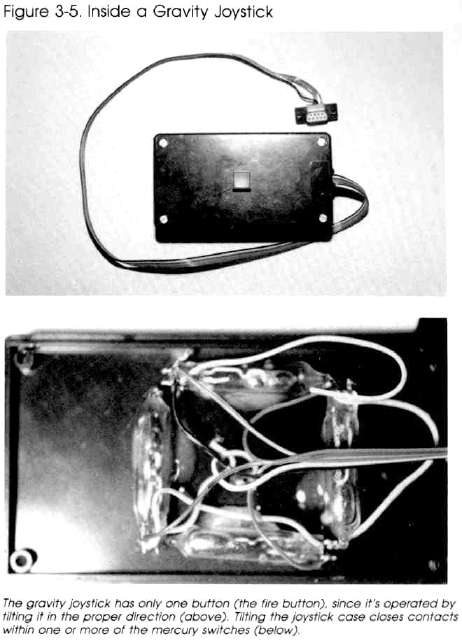
| A Gravity Joystick You can also use other types of switches to make a joystick. One alternative is to use tilt switches in place of the four directional push button switches. A tilt switch is a switch which closes only when it's tilted in the proper direction. One type of tilt switch consists of a plastic case with a metal ball inside. When the case is held at the proper angle, gravity causes the ball to roll to one side, where it touches both terminals of the switch, closing the contact. Some tilt switches use liquid mercury in place of the metal ball. If you're using tilt switches, be sure to mount them inside the plastic case of your joystick to prevent them from breaking. |
|

|
Warning: This is especially important if you're
using mercury switches. Mercury is a potential health hazard. |
|
The switches can be glued to the inside of the case
using epoxy and should be mounted so that they close (turn on) when the
joystick is tilted in the proper direction. This means the right switch
should close when the case is tilted to the right, the left switch should
close when the case is tilted left, and so on. You tilt the gravity joystick in the direction you would normally push the control stick if you were using an ordinary joystick. Because of its unique feel, the gravity joystick adds another dimension to game playing. While moving objects on the screen is easy, keeping them stationary requires steady hands. Your joystick, whether push button or tilt switch, will work with any programs requiring a joystick. In fact, you may want to try making your own custom controller, perhaps something as unusual as a steering wheel for a racing game. |
Return to Table of Contents | Previous Chapter | Next Chapter