Chapter
2
This
is Your Atari
Computer
The Atari computer family contains some of the most widely used computers in the home market today. They were able to integrate the graphics and sound capabilities which were Atari, Inc.'s trademark in the video game arena with the capabilities of a personal computer.
As with the rest of the personal computer industry, the Atari computer line has experienced constant evolution. It began with the original models 400 (16K) and 800 (48K) which introduced the world to the potential of a low-cost computer system. These machines were well received for their superb sound and graphics capabilities.
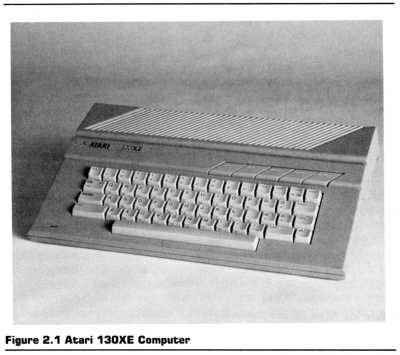
Then Atari upgraded its product line with the XL series including the 600XL, 800XL and 1200XL. These computers included many improved features and an upgraded Random-Access Memory (48K in 600XL and 64K in 800XL and 1200XL models). The latest model in this series of computers is the 130XE computer. This computer comes complete with Atari BASIC and 128K of RAM, truly the most powerful machine of the series.
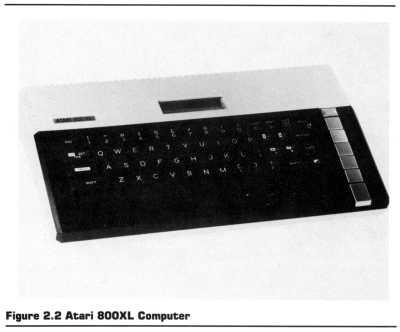
This book is written to help you in integrating your XE/XL computer with any one of the Epson printers. All of the programs and most of the information contained in this book will work with any of the XL computers or the 130XE. For the sake of simplicity, I will be using the Atari 800XL as the example computer.
ATARI COMPUTER
Although your Atari computer may just look like a keyboard, it is a complete computer which has more memory and more features than the large expensive computers of just a few years ago.
This small beige box is the workhorse of your computer system. If you were to remove the cover, you would find a circuit board covered with small black boxes called microprocessors. This is where it stores, manipulates and processes information.
THE KEYBOARD
At first look, the Atari computer keyboard resembles that of a regular typewriter. Upon closer examination (of the 800XL), you will notice keys on the left and right of the keyboard that are unique to the Atari computer.
On the left, you will see keys marked with:
1) ESC,
2) CLR/SET/TAB, and
3) CONTROL.
On the right, are keys for:
1) CLEAR/<,
2) INSERT/>,
3) DELETE/BACKSPACE,
4) four keys with directional arrows, and
5) a half-shaded rectangle (inverse video key).
Even further to the right is a column of five keys. These keys are marked:
1) RESET,
2) OPTION,
3) SELECT,
4) START, and
5) HELP
These are function keys. Their functions may be defined by a program that is running on your Atari computer. This means that not all of them may be functional in all of the programs. The program will tell you how they are to be used.
OUTLETS, PORTS AND HOLES
Your Atari computer communicates with the outside world through the outlets and ports found on the top, right and rear of the computer. On the top, you'll find a cartridge slot. This is where cartridge-based programs are connected into the system. Although most cartridges contain games, there are many fine applications programs like AtariWriter which can also be found on cartridge.
On the right side you'll find two ports. These ports are for any of the various external control devices available for the Atari computer. These devices include joysticks, paddles, light pens, and digitized pads.
Across the back are five connections and two switches. From left to right are:
1) Peripheral Port-this serial port connects with the disk drive or printer adapter;
2) Parallel Bus-this is the parallel connection to the outside world. It will be used with most Epson printers;
3) Monitor Connection- a direct 5-pin connection for color computer monitors. Will not work with a television;
4) TV Connector-supplies both the audio and video to your television set;
5) Channel Selector-selects the output channel on your television from channel 2 or 3;
6) Power In-Port-connect your power supply to this port;
7) Power Switch-turns power on or off.
Each of these connections allows your Atari computer to communicate with other devices, computers, or humans. Without these connectors, your computer would be a useless machine because it would have a limited way to receive information and no way to dispense its processed information to be used.
THE MONITOR-A WINDOW TO THE ACTION
Many people are under the misconception that typing on the computer places information into the monitor. This is a reasonable assumption because the characters appear on the screen and the screen is part of the monitor. The monitor, however, has no place to store this information. It is only a viewport. It is a window to the activity happening within your Atari computer.
Your Atari computer can use either a standard television (black-and-white or color), or a special video monitor to display its information. The television for a monitor is the least expensive since almost every home has one. The video monitor, on the other hand, produces a much clearer picture than a television and is easier on the eyes when using your computer for long periods of time.
410 PROGRAM RECORDER
When you turn off your computer, all of the information that is stored within it is lost. If you spent 3 hours typing in a chapter of a book and then turned off your Atari computer, you would lose all of your work and would have to redo it. To avoid this problem, you could leave your computer on 24 hours a day, or find some way of saving the information in a way that could later be loaded into the computer to be used.
Atari has an inexpensive way for you to save your data. It is called the 410 Program Recorder. This is a specially adapted version of a cassette tape recorder that will record your information on tape in such a way that can be reloaded into your computer at a later date. It connects into the peripheral port on the back of your Atari computer.
Once the 410 Program Recorder saves information onto a tape, it is unable to retrieve only specific programs for use in the computer. This is a disadvantage because the 410 Program Recorder must load the complete contents of the tape into your Atari computer so that your computer can sort through and find the information it needs. This means that one cassette may fill your computer's memory with several programs when the desired program is only 3 kilobytes long.
DISK DRIVES
Another way to store information is with a disk drive. A disk drive is similar to a record player in operation except it has the ability to both play and record. The disk drive records information or programs on 51/4-inch disks called "floppy diskettes."
A disk drive is more expensive than a 410 Program Recorder, but it is much faster and provides a more efficient use of the internal memory of your Atari computer. A disk drive stores information in specific locations on floppy diskettes. When you request information from the disk drive, it can look for the title of that file in its directory, locate that position on the floppy disk and load only the pertinent information into your computer. This means that your computer's memory will not be burdened with unnecessary programs and information, leaving more workroom for your programs to run.
Both the model 810 and 1050 drives will work with the Atari XE/XL computers. This means that you can upgrade from a 600XL to a 130XE and not have to buy new drives.
POWERING UP YOUR ATARI COMPUTER
Once you have your Atari and all of its peripherals hooked together, it's time to turn on the power. The Atari computer is especially sensitive when it's turned on so I have included the suggested power-up procedure.
The most important part of this power-up/power-down procedure is to turn your computer on LAST and to turn it off FIRST. The order of the peripherals is actually inconsequential but I have found this order to be the easiest.
1) Turn on your monitor or television.
2) Turn on your disk drive (make sure you don't have any diskettes in it when you do) or 410 Program Recorder.
3) Turn on your Epson printer.
4) Turn on your Atari computer using the power switch on the right side.
When you have finished using your computer system, turn them off in the reverse order.
1) Turn off your Atari computer.
2) Turn off your monitor.
3) Turn off your disk drive.
4) Turn off your Epson printer.
This is your Atari computer. Together with your Epson printer it can make a powerful workstation that will enrich your life and make many of your day-to-day activities easier and more productive. The next chapter will describe how to hook them together and where to set them up for maximum efficiency.
Return to Table of Contents | Previous Chapter | Next Chapter