Chapter 4
Writing an Assembly Language
Program
Here it is, at long last, the assembly language program we promised you, a program you can type, assemble and execute without having to rely on any BASIC commands. The program was written on an old, battle-scarred Atari 800 computer, using an Atari Assembler Editor cartridge almost as ancient. But the program will run on any Atari computer and, like all of the programs in this book, it is totally compatible with both the Atari Assembler Editor cartridge and the newer and faster MAC/65 assembler manufactured by OSS (Optimized Systems Software, Inc., of San Jose, CA).
With a few minor but critical revisions such as eliminating line numbers and changing the "*=$0600" directive in line 40 to "ORG $0600", this program, and all of the others in this book, can also be converted into programs that will work with the Atari Macro Assembler and Text Editor. But unless you're already an assembly language programmer, I strongly recommend that you type, assemble, debug and edit the programs in this book using an assembler more like the ones they were written on: the MAC/65 assembler and the Atari Assembler Editor cartridge.
Here's the program we'll be working with in this chapter. As you can see, it's a very simple program for adding 2 and 2. Let's take a close look at it, and see how it does what it's supposed to do.
AN 8-BIT ADDITION PROGRAM
ADDNRS.SRC
10 ;
20 ;ADDNRS.SRC
30 ;
40  *=$0600
50 ;
60  CLD
70 ADDNRS CLC
80  LDA #2
90  ADC #2
100  STA $CB
110  RTS
120  .END
Download / View (Assembly source code)
Screen Shot Of ADDNRS.SRC
Look closely at this program and you'll see that the numbers it's supposed to add, 2 and 2, are in line 80 and 90. After the program adds 2 and 2, it stores the result of its calculation in memory address $CB (or 203 in decimal notation). That happens in line 100. Some of the instructions in the program may look familiar; we've touched on most of them in the preceding chapters. But there are a few items in the program that are encountered here for the first time. These include the semicolons in the first few lines of the program, the "*=" directive in line 40, and the ".END" directive in line 120.
Spacing Out
As you can see more clearly in the "explosion diagram" that follows, the program's source code listing is divided into four fields, or columns. If each field had a heading, and if the program listing weren't all jammed together, here's what you would see:
AN 8-BIT ADDITION PROGRAM (ADDNRS.SRS)
(Column-by-Column Listing)
FIELD    LINE                OP
NAMES    NO.       LABEL     CODE     OPERAND     REMARK

         10                                       ;
         20                                       ; ADDNRS.SRC
         30                                       ;
         40                  *=       $0600
         50                                       ;
         60        ADDNRS    CLD
         70                  CLC
         80                  LDA      #2
         90                  ADC      #2
         0100                STA      $CB
         0110                RTS
         0120                .END
Only an Example
The above listing is provided only as an illustration of what a source code listing would look like if its four fields; line numbers, labels, op codes and remarks, were clearly separated into columns. Actually, no one write source code listings this way.
When you write a source code listing using MAC/65 or the Atari Assembler Editor cartridge, the usual way to do it is to type your fields in a format that is rather jammed together; crammed together so tightly, in fact, that the columns don't line up at all. Once you get a little practice writing code in this format, though, it practically becomes second nature.
These are the rules:
Line Numbers
When you write a source code listing using MAC/65 or the Atari Assembler Editor cartridge, each statement, or line, must be assigned a line number. The line numbers of the program are typed flush left, just as they are in BASIC programs. Line numbers aren't really necessary in assembly language programs, and are not required by some assemblers. The Atari Macro Assembler and Text Editor package, for example, doesn't require the use of line numbers and won't assemble a program that includes them. But MAC/65 and the Atari Assembler Editor cartridge do use line numbers, so we'll use them too, at least for now.
The line numbers in the first column of our addition program progress in increments of 10, just like the numbers in a typical BASIC program. They don't have to be written that way, but, as is also the case in BASIC programs, they usually are. Line numbers can range from 0 through 65535.
Labels
Labels, if they are used, occupy the second field in assembly language statements. Exactly one space, not two, must be left between a line number and any label that follows it. If you start a label two or more spaces after a line number, or if you use your tab key to get to your label field, you may clobber your program. In assembly language programs, labels are used to identify the first lines of routines and subroutines. Our program for adding 2 and 2, for example, is labeled ADDNRS in line 60.
Since our program has a label, the program could be used as a subroutine in a longer program, and could easily be accessed by its label. Several kinds of assembly language instructions could be used to call it; for example, JSR ADDNRS (Jump to SubRoutine at label ADDNRS), BCS ADDNRS (Branch on Carry Set to label ADDNRS), or JMP ADDNRS (JuMP to label ADDNRS). In the first example, ADDNRS would end with the RTS (ReTurn from Subroutine) instruction in line 100. RTS performs the same kind of job in assembly language that the RETURN instruction performs in BASIC; it signals the end of a subroutine, and returns control back to the main body of the program. In the latter examples, a second branch or jump instruction would be used to transfer control instead of the RTS.
We'll discuss jumping, branching instructions, and subroutines at greater length in later chapters. For now, what's most important to remember is that when you type a source code listing on a MAC/65 assembler or Atari Assembler Editor cartridge, one space and only one space must be used to separate each label you use from its line number. A label can be as short as one character and as long as the length of a statement permits (106 characters minus the number of characters in the statement's line number). Most programmers use labels three to six characters long.
Operation Code Mnemonics
An operation code (or op code) mnemonic is just a fancy name for an assembly language instruction. There are 56 op code mnemonics in the 6502 instruction set, and they are the only ones that can be used in Atari assembly language instructions. Op code mnemonics such as CLC, CLD, LDA, ADC, STA and RTS are typed in the op code field of assembly language source code listings. When you write a program using a MAC/65 or the Atari Assembler Editor, each op code mnemonic you use must start at least two spaces after a line number, or one space after a label. An op code mnemonic placed in the wrong field will not be flagged as an error when you type your program, but will be flagged as an error when your program is assembled.
The op code field in a source code listing is also used for directives and pseudo ops; words and symbols that are entered into a program like mnemonics but are actually members of the 6502 instruction set. The asterisk in line 40 of our program is a directive, and the ".END" statement in line 120 is a pseudo op. The "*" directive is used to tell your computer where an assembly language program is to be stored in memory after it is assembled. The ".END" directive is used to tell the assembler where to stop assembling, and to end an assembly language program.
Operands
The operand field in a MAC/65 Atari Assembler program starts at least one space (or a tab) after an op code mnemonic. Operands are used to expand op code mnemonics into complete instructions. Some mnemonics, such as CLC, CLD and RTS, do not require operands. Others, such as LDA, STA and ADC, do require operands. We'll be providing much more information about operands later on.
Comments
Comments in assembly language programs are like remarks in BASIC programs; they don't affect a program in any way, but are used to explain programming procedures and to provide eye saving space in program listings. There are two ways to write comments in source code listings written on the MAC/65 and the Atari Assembler Editor. One method is to put comments in the label field of a listing, preceded by semicolons. The other method is to put them in a special "Comments" field that occupies what's left of each line following the instruction fields (the op code and operand fields). If you use the "Comments" field at the end of a line and don't have room there for the comment you want to write you can continue your remarks on the next line by simply typing a space, a semicolon, and the rest of your comments.
Examining the Program
Now that we've looked at our sample program field by field, let's examine it line by line.
Lines 10 Through 30
(Comments)
Lines 10 through 30 are comments. Line 20 explains what the program does and lines 10 and 30 set off the explanatory lines with white space. It's good programming practice to use remarks liberally in assembly language, as well as in most other programming languages, so we've used quite a few comments in the program in this volume.
Line 40
("*=" Directive)
This is the origin line of our sample program. Every assembly language program must start with an origin line. As you may remember from Chapter 1, the first thing a computer does when it runs a machine language program is go to a predetermined memory location and see what it finds there. So when you write an assembly language program, the first thing you have to do is tell your computer where to start looking for the program in its memory. When your assembler encounters an origin directive, it will set the program counter of your computer's 6502 processor to the address given in the directive. The first instruction in the program will then be loaded into that memory location, and the rest of the program will follow in sequence.
The origin directive looks like a simple line to write, but deciding what number to put in this line can be a very tricky job, especially for the beginning assembly language programmer. There are many blocks of memory in your computer that you can't use for assembly language programs because they're reserved for other uses (for example, to hold your computer's operating system, disk operating system, BASIC interpreter, and so on). Even the assembler that you'll use to write this program takes up a block of memory space that is forbidden territory for you, at least until you become familiar with certain landmarks you can use to find your way through the jungle of your computer's memory.
Until then, there does happen to be one small block of memory that's reserved, under ordinary circumstances, for just the kind of short, user-written assembly language programs that we're going to be working with in the next few chapters. The block of memory is called page 6 because it runs from memory address $0600 to $06FF (1536 to 1791 in decimal notation). Page 6 is only 256 bytes long, but that's more than enough space for the program we're going to be working with in this chapter, and for the other programs that we're going to be working on for the next few chapters. Later on, as your programs grow longer, you'll learn how to move on to larger blocks of memory. Line 40 in our sample addition program tells your computer that the program you're going to write will start at memory address $0600 (1536 in decimal notation).
Line 50
(Blank Line)
This "Comment" line just separates the origin line from the other lines in our program. The white space looks nice, doesn't it?
Line 60
ADDNRS CLD
(Label: ADDNRS)
(Mnemonic: "Clear Decimal Mode")
ADDNRS: We've used the label field in this line to name our program ADDNRS. So if we ever decide to use our program as a routine or a subroutine in a larger program, it will have a name. Then we can address it by its name, if we wish, instead of by its memory location. It is usually good programming practice to give labels to important routines and subroutines. A label not only makes a routine easier to locate and use, it also serves as a reminder of what the routine does (or, until your program is debugged, what it's supposed to do).
CLD: We're using plain binary numbers in this program, not Binary Coded Decimal (BCD) numbers. So in this line we'll clear the decimal mode flag of the 6502 processor status register. The decimal flag need not be cleared before every arithmetical operation in a program, but it's a good idea to clear it before the first addition or subtraction operation in a program, since it just may have been set during a previous program.
Line 70
CLC
("CLear Carry")
The status register's carry flag is affected by so many kinds of operations that it's considered good programming practice to clear this flag before every addition operation. It takes only one half a millionth of a second, and just one byte of RAM. Compared to the time and energy that debugging can cost, that's a bargain.
Line 80
LDA #2
("LoaD Accumulator with the Number 2")
This is a very straightforward instruction. The first step in an addition operation is always to load the accumulator with one of the numbers that is to be added. The "#" sign in front of the number 2 means that it's a literal number, not an address. If the instruction were "LDA 2," then the accumulator would be loaded with the contents of memory address 0002, not the number 2.
Line 90
ADC #2
("ADd with Carry the number 2 to the accumulator")
This is also a straightforward instruction. "ADC #2" means that the literal number 2 is to be added to the number that's in the accumulator; in this case, another 2. As we've mentioned, there is no 6502 assembly language instruction that means "add without carry." So the only way that an addition operation can be performed without a carry is to clear the status register's carry flag and then perform an "add with carry" operation.
Line 100
STA $CB
("STore Accumulator in Memory Address $CB")
This line completes our addition operation. It stores the contents of the accumulator in memory address $CB (decimal 203). Note that the symbol "#" is not used before the operand (CB) in this instruction, since the operand in this case is a memory address, not a literal number.
Line 110
RTS
("ReTurn from Subroutine")
If the mnemonic RTS is used at the end of a subroutine, it works like the RETURN instruction in BASIC; it ends the subroutine and returns to the main body of a program, beginning at the line following the line in which the RTS instruction appears. But if the RTS is used at the end of the main body of a program, as it is here, it has a different function. Then, instead of passing control of the program to a different line, it terminates the whole program and returns control of the computer to the input device that was in control before the program began, usually a cartridge, an operating system, a keyboard screen editor, or a machine language monitor.
Line 120
".END" Directive
Just as the "*=" directive begins an assembly language program, the ".END" directive ends it. The .END directive tells the assembler to stop assembling, and that's exactly what the assembler does, even if there's more source code after the .END directive. The .END directive can therefore be used as a powerful debugging tool. You can put it wherever you want in a program you're debugging, and that's where the assembler will always stop assembling, until you remove the ".END" directive. When you've finished debugging your program you can use the .END directive to bring the routine neatly to an end. Before you can do that, of course, you must remove any leftover .END directives that my still be hanging around, that is, if you want your final program completely assembled. When debugging is complete and your program is finished, it should contain only one .END directive, where it belongs � at the very end of your program.
Assembling an Assembly Language Program
OK. Are you ready to write and run your first assembly language program? Good. Then sit down at your computer, turn on your disk drive and your video monitor, and boot up your assembler (if it's on disk), or slip your assembler cartridge (If that's the kind of assembler you've got) into the cartridge slot in your Atari. If you're using a MAC/65 assembler or an Atari Assembler Editor cartridge, your assembler will be ready to go when the word "EDIT", the assembly language equivalent to BASIC's "READY" prompt, appears on your video monitor. If that doesn't happen, then check all of the connections on your computer components and repeat the start-up process. Until you get an "EDIT" prompt, you can't do any assembly language programming.
When you have your assembler up and running you can put a blank, formatted disk into your disk drive. This disk should have a set of DOS files recorded on it so that your data disk will boot automatically when you turn your computer on, without any need for a special master disk. If you put every program in this book on your data disk, you'll still have room for a set of DOS files, and they'll save your quite a bit of time.
Entering Your Program
When the "EDIT" prompt comes up on your screen, you can type the addition program (source code version) at the beginning of this chapter into your computer. As you type the program, be very careful about the spacing you use. MAC/65 and the Atari Assembler Editor cartridge are a bit fussy about spacing. In the lines that contain semicolons, remember that there should be only one space between the line number and the semicolon. In line 40, however, there should be at least two spaces between the line number and the asterisk, since "*" is a directive, and since directives appear in the op code field of MAC/65 and Atari Assembler Editor programs.
In line 60, there should be one space between the line number and the "ADDNRS" label, and one space between "ADDNRS" and the mnemonic "CLD." In lines 70 through 110 there should be at least two spaces between each line number and the op code that follows. And in line 120 there should be at least two spaces between the line number and the ".END" directive. If you make a mistake while typing a line, you can move back and correct it, using the cursor control (arrow) keys on your keyboard.
Listing Your Program
All right now. After you've typed you source listing of Program 1 into your computer, type the word LIST and you should see a screen display that looks like this:
EDIT
LIST

10 ;
20 ;ADDNRS.SRC
30 ;
40  *=$0600
50 ;
60 ADDNRS CLD
70  CLC
80  LDA #2
90  ADC #2
0100  STA $CB
0110  RTS
0120  .END

EDIT
If you have a printer you can now print your program out on paper. Just type:
LIST #P:
Easy enough, right? No sooner typed than done! Now, if your listing looks right, you can save your program on a disk. Just make sure that a formatted disk (preferably a blank one) is in our disk drive and the ready light is on. Then type:
LIST #D:ADDNRS.SRC
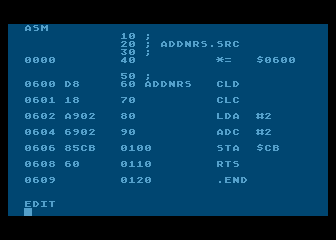
The top red light on your disk drive should now go on, and the disk you're storing your program on should start to spin. When your disk drive's "busy" light goes off, your source code should be safely recorded on a disk under the file name #D:ADDNRS.SRC. We suggest you keep your ADDNRS.SRC source code in a safe place, since we'll be working some more with this program in later chapters. Right now, in fact, you can use that very source code to assemble your program. To do that, just keep your source code disk in your disk drive, keep your Assembler Editor cartridge in your computer, and type the command ASM. As soon as you've done that, your computer should present you with a screen display that looks something like this:
EDIT
ASM
PAGE 1
               10 ;
               20 ;ADDNRS.SRC
               30 ;
0000           40  *=$0600
               50 ;
0600 D8        60 ADDNRS CLD
0601 18        70  CLC
0602 A902      80  LDA #2
0604 6902      90  ADC #2
0606 85CB      0100  STA $CB
0608 60        0110  RTS
0609           0120  .END

*** ASSEMBLY ERRORS: 0     23202 BYTES F1
REE
 PAGE 2
SYMBOLS

 0600 ADDNRS

EDIT
1This depends on the version of DOS that you have.
Screen Shot Of ADDNRS.SRC Assembled
With The Atari Assembler Editor
If you've made any typing errors in your program, this is where you'll probably find out about them. If your assembler finds an error in a line, it will sound a beep and display an error message. It may not b3e able to spot every error you make, but when it does catch one, it will print an error number on your screen (just like a BASIC interpreter does), and you can find out what the number means by consulting your MAC/65 or Atari Assembler Editor user's manual. If your assembler finds any errors in your program you can now type LIST and go back and correct them. Then you can type ASM again and try once more to assemble your program. Once you object code listing has been printed out on your screen without any error messages, you'll know that your program has been assembled correctly; and that you have just written and assembled your first assembly language program!
A Difference Between Assemblers
Now we've come to an important difference between the Atari Assembler Editor cartridge and the MAC/65 assembler. When you assemble a source code program using the Atari Assembler Editor cartridge, the object code generated by the assembly process is automatically entered into your computer's memory. When you assemble a program using the MAC/65 assembler, however, the object code is not automatically stored in memory unless you use a special directive. That directive is .OPT (for "OPTion"). The option directive is used in this format:
05.OPT OBJ
If you have a MAC/65 assembler, you can insert that line into your ADDNRS.SRC program, and the program will automatically be stored in RAM as it is assembled.
What Next?
Once you've stored a program in RAM, you can do just about anything with your program you like; run it, print it on paper, store it on disk, or store it in your computer's memory. Before you do any of those things, however, it might be a good idea to take a closer look at the ADD.NRS program, the object code listing of the program in its final assembled form. In column 1 of your object code listing you'll see the memory addresses in which your addition will be stored after it has been loaded into your computer's memory. Column 2 is the actual object code listing of your program. It's this column that will show you, in hexadecimal notation, the actual machine code version of the program. This is what the numbers in column 2 mean:
SOURCE CODE   MACHINE CODE   MEANING

CLD           D8             Clear status register's decimal mode flag
CLC           18             Clear status register's carry flag
LDA #2        A9 02          Load accumulator with the number 2
ADC #2        69 02          Add 2, with carry
STA $CB       85 CB          Store result in memory address CB (decimal 203)
RTS           60             Return from subroutine
Now, if you like, you can print your assembly listing out on paper. Simply type ASM, #P: and you'll get a hard copy listing of your assembled program.
Saving Your Program
You've now written, assembled and printed your first assembly language program. And that means that we're almost ready to end this programming session. But before you turn off your computer, it wouldn't be a bad idea to save the object code of our program on a disk. So let's do that right now.
"LIST" or "SAVE"?
A few paragraphs back you saved the source code of your addition program with the command LIST. But to save the object code of an assembly language code, there are two other commands. One is SAVE. The other is BSAVE. If you're using a MAC/65 assembler, the command to use at this point to save the object code version of ADDNRS is BSAVE. If you're using the Atari Assembler Editor, however, the command to use is SAVE.
Saving an Object Code Program
The SAVE and BSAVE commands are used in exactly the same way, however. Here's how it's done: First, type the command ASM, and your computer will assemble the source code of your addition program. (If you've already done that, there's no harm in doing it again). Next, look at column 1 of the object code listing on your screen and note the memory addresses that your program has been assembled into. The program should start at memory address $0600 and should end at memory address $0609. So this is the line to type if you have a MAC/65 assembler.
BSAVE #D:ADDNRS.OBJ<0600,0609
And this is the line to type if you have an Atari Assembler Editor cartridge:
SAVE #D:ADDNRS.OBJ<0600,0609
As soon as you type that line and hit your RETURN key, the "busy" light on your disk drive should light up, and your disk should start to spin. When the "busy" light goes off and your disk drive stops, the object code listing of our addition program should be safely stored on a disk under the file name #D:ADDNRS.OBJ.
Did it Work?
Now let's check to see whether all of that LISTing and SAVEing worked. First type the word NEW and press the RETURN key to clear your computer's memory. Then type "ENTER #D:ADDNRS.SRC." Your disk drive should spin, and the EDIT should appear on your screen. Now, if you type the word LIST, the source code listing for the ADDNRS program should come right up on our video screen. Now, if your assembler is a MAC/65, type the line "BLOAD #D:ADDNRS.OBJ," and hit the RETURN key. If you have an Atari Assembler Editor cartridge, type "LOAD #D:ADDNRS.OBJ". Your disk drive should now load the object code of the ADDNRS program into your computer, and the word EDIT should appear once more. Then, if you type the command ASM again, the assembly code listing of the ADDNRS program should appear on your video screen.
Moving Along
You've accomplished quite a bit in this chapter. You've written and assembled your first assembly language program and, hopefully, you have a pretty good understanding of how it was done. You've saved both your source code listing and your assembly code listing on a disk. If you have a printer, you've also printed out both listings on paper. And now, in Chapter 5, you're going to learn how to run an assembly language program.
Return to Table of Contents | Previous Chapter | Next Chapter
